Choose your apps and manage billing
Each AOZO app is its own subscription. Switch apps on, change plans and cancel from one place.
You pay only for the apps you use. Apps share one login, one set of people and one workspace.
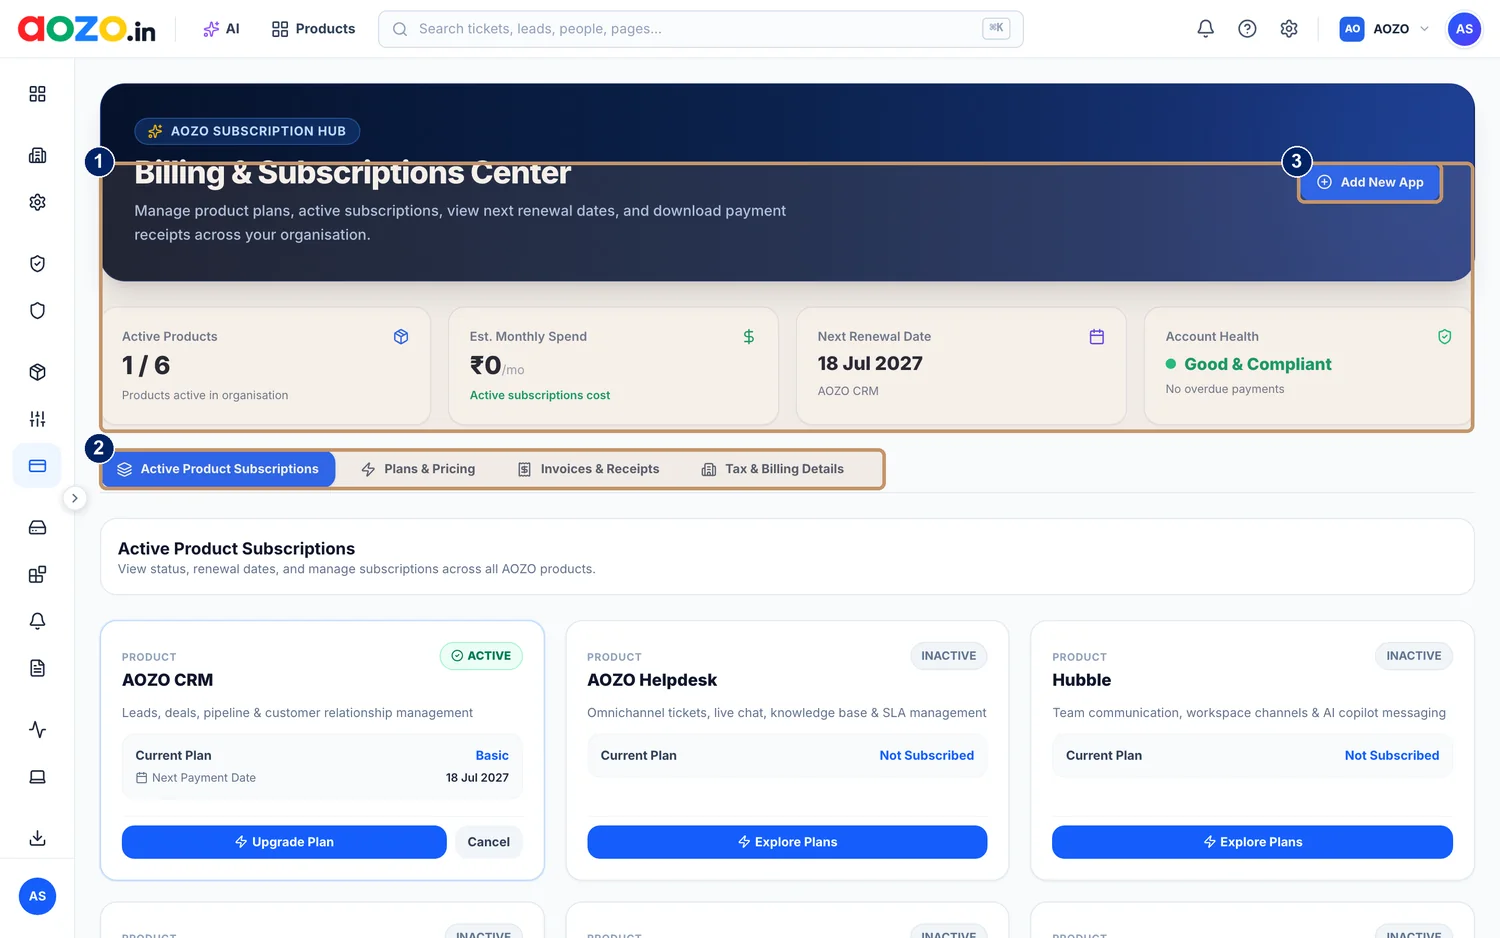
- Summary: active products, estimated monthly spend, next renewal date and account health
- Tabs: Active Product Subscriptions, Plans and Pricing, Invoices and Receipts, Tax and Billing Details
- Add New App
#Read the summary

- The four summary cards
| Card | Meaning |
|---|---|
| Active products | How many apps are on, out of the apps available |
| Estimated monthly spend | What your active subscriptions cost per month |
| Next renewal date | When your next payment is due, and for which app |
| Account health | Whether your payments are up to date |
#Switch on an app
Open Billing and Subscriptions
From your workspace, open the Billing and Subscriptions Center.

- Billing tabs
Choose Add New App
Or pick an inactive app and choose Explore Plans.

- Add New App
Pick a plan
Choose the plan that fits and confirm.


Note
Only the apps your workspace has subscribed to are reachable.
#Change a plan or cancel
- On an active app, choose Upgrade Plan to move up, or Cancel to stop it.
- Cancelling stops future renewals. You keep access until the end of the paid period.
- Plans are chosen per app, for example one plan for CRM and another for Hubble.
#Invoices and tax
- Open Invoices and Receipts to download invoices and receipts.
- Open Tax and Billing Details to add your billing details.
- Prices are in rupees (₹). GST is added where applicable and shown on your invoice.
For refunds, see the Refund Policy.