Set up QR ordering
Add tables, print one QR per table and test before your first service.
QR ordering works best when the basics are ready before the dinner rush.
#What guests see
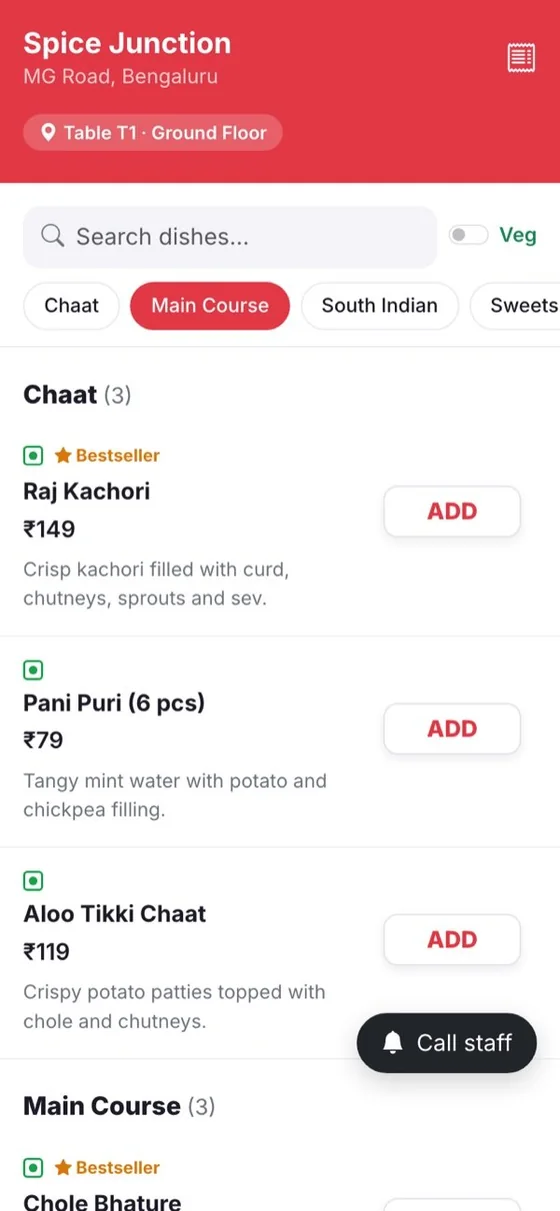
The QR menu a guest sees after scanning the table QR.
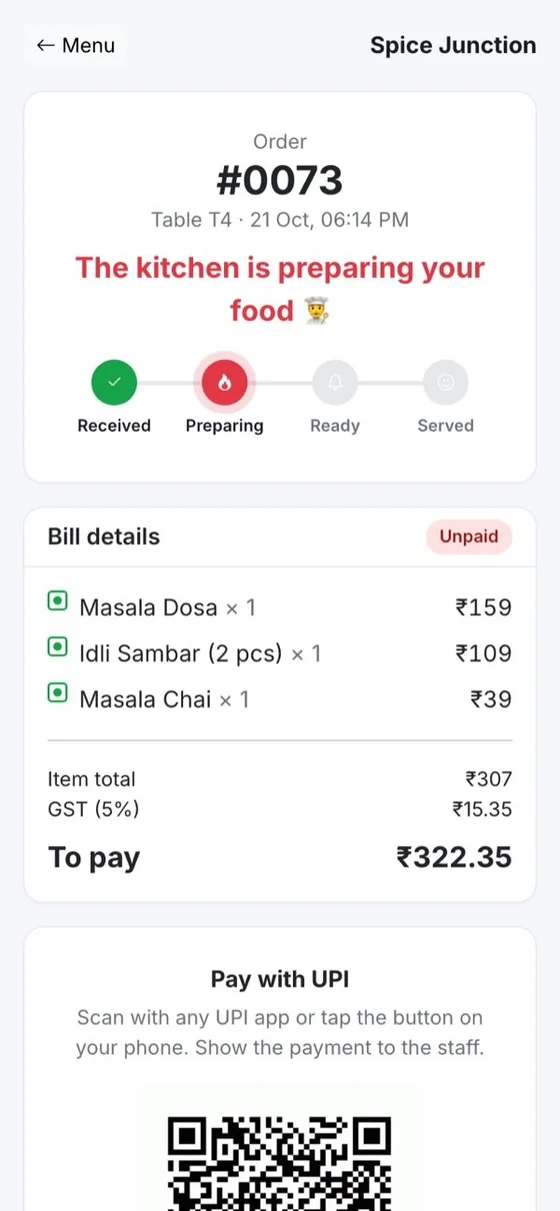
The status and bill screen, with a UPI QR for the exact amount.
#Set it up
Check your menu
Put categories in the order guests expect, check veg and non-veg marks on every dish, and update prices and photos.
Mark what is unavailable
Mark anything not available today as sold out. It disappears from ordering instantly.
Add your tables
Open Tables and QR and add every table.
Print the QR codes
Print one QR per table from the dashboard.
Place them
Stick the QRs where guests can scan without moving plates.
Test
Place one order from your own phone in each section of the floor and watch it reach the kitchen.
#Guest buttons and approval
Guests can tap Call waiter, Water and Bring the bill from the menu. You can also require staff approval so QR orders are accepted before they reach the kitchen.